Thumbprint Cookies

Tags

, , ,

I thought it was time to put the fancy layer cake recipes aside and share a recipe of cookies I made a few days ago. These cookies are amazing! They’re made out of a shortbread like dough that’s covered in toasted chopped up hazelnuts and filled with some jam. They’re also really simple and quick to make which is why I made them twice in the last two days.

It was my little niece’s birthday party last Sunday and I knew that as well as baking a cake (of which I unfortunately didn’t take a picture of, there was too much going on) I wanted to make cookies. I decided on making thumbprint cookies because of they’re simplicity and since it was going to be a baby party I wanted to make some cookies that were small and cute.

The recipe is yet again from Joy of Baking, this is actually the first site that got me into baking in the first place. Back in the days when I was a lot less knowledgeable about the arts of baking and caking I would still always end up with good results from this site. Even though I’ve become more precise with my preparations of dessert this site still remains close to my heart and I go there whenever I need some quick inspiration.

I filled my cookies with a mixed berry jam but you can use whichever jam you prefer. I think the slight tartness of the berries complements the sweet and buttery cookie perfectly. I also used hazelnuts to cover the cookies in but again you can use a different nut if you like. I do highly recommend toasting the nut in the oven before as it really brings out its flavor and also makes it easy to get the skin off once they’re done toasting.

On with the recipe

Thumbprint Cookies
makes about 20-24 cookies

113 g unsalted butter, room temperature
50 g granulated white sugar
1 large egg, separated
1 tsp. vanilla extract
130 g all purpose flour
pinch of salt
80 g hazelnuts, almonds, pecans or walnuts, toasted and finely chopped
1/2 cup jam of choice

To toast the nuts

Spread nuts on a baking sheet and bake in a 180 degree C oven for 10-12 minutes until light golden-brown in color and fragrant. Remove from oven and place the hot nuts in a dish towel. Roll up the towel and let the nuts sit for a few minutes then rub the nuts in the towel to remove the skins. Let cool completely. Once the nuts have cooled chop the nuts with your knife into smaller pieces. I left some bigger pieces amongst them since I like the crunchiness in the cookie. You could also pulse the nuts in your food processor.

For the cookie

Beat the butter and sugar until light and fluffy in a medium sized bowl for about 2-3 minutes. Add the egg yolk and vanilla extract and beat until combined.

In a separate bowl, whisk together the flour and salt. Add the flour mixture to the batter and beat just until combined. If the batter is too soft to roll into balls, refrigerate for about 30-60 minutes.

Preheat oven 177 degrees C (350 degrees F) and place rack in center of oven. Line a baking sheet with parchment paper.

In a small bowl, whisk the egg white until frothy. Place the finely chopped nuts on a plate. Roll the dough into balls. To get uniform sized cookies I weighed out each ball. I made mine to be 12-13 grams each. Taking one ball of dough at a time, dip first into the egg white and then lightly roll in the nuts. Place on the prepared baking sheet spacing about 2 cm apart. Using your thumb or end of a wooden spoon, make a indentation into the center of each cookie and fill with about 1/2 teaspoon of jam. You can either fill the with a small jam or Pipe the jam in for a less messy version. I made a small piping bag by shaping a rectangle shaped parchment paper into a cone, filling it with some jam and then cutting a small piece of the tip off.

Bake for about 12 – 15 minutes, or until cookies are set and the nuts have nicely browned. Remove from oven and let them cool.

If you don’t plan on serving the cookies on the same day, you could also bake them without the jam to prevent the cookies from getting soggy. Then you can fill the cookies on the day you are planning to serve them.

I highly recommend making those cookies, you won’t regret it. The cookies will keep covered in room temperature for about 4 days but I seriously doubt the will last that long in the house.

Until next time
Sarah

Orange Berry Muffins

Tags

, ,

I have a new favorite baking book. Not that I ever had a particular favorite before since I actually only own 2 at the moment. As I mentioned in one of my earlier posts, I bought the Baked Explorations book while I was in Estonia and fell in love with it. But the thing is I actually get most of my recipes and inspiration from the internet on sites like Foodgawker or Tastespotting. These sites offer such a wide variety of different food recipes and have a personal touch to them since all the recipes are posted by fellow food bloggers who, in addition to the recipe, share little stories of their lives and happenings.

For my birthday I received my second baking book (from my brother and incredibly gorgeous and amazing sister-in-law, who I am hoping will read this) and I am literally obsessed with it. I got Dorie Greenspan’s Baking: From My Home to Yours. It’s a heavy book filled with amazing looking recipes and pictures. Her desserts vary from breakfast treats to cookies of all kinds, cakes, tarts, pies and even ice cream. I feel like I don’t ever need to look up recipes for desserts again since I’ve basically got it covered with this book. I also really love the French influence in many of her recipes. If anyone of you has ever been to France you’ll probably know that this country, with its pastries, tarts and macarons, is truly dessert heaven.

Anyway, moving on to the first recipe I made from Dorie (I love calling her by her first name, it makes me feel as if we’re friends). I knew I didn’t want to make anything too sweet or heavy since we just celebrated me and my niece’s birthdays with the decadent chocolate almond torte and I’m sure most of us were still digesting it the next day. So I opted on muffins for breakfast. I looked through the muffin recipes in the book and the Orange Berry Muffins appealed to me immediately. Firstly because of the blueberries. I honestly don’t know a single person who doesn’t like blueberries. In fact, I think our population is divided into people who either love blueberries or are completely obsessed with them and consume them in unmeasurable amounts when in season. Unfortunately I had to use frozen ones since I didn’t find fresh ones in the supermarket anymore. I thought I still saw some last week but I guess these were the last ones. Now the fruit/vegetable section is slowly stocking up on the different types of pumpkin, sweet potatoes and apples. I’m looking forward to making fall desserts!

The other reason this muffin recipe appealed to me was also the fact that it used some orange zest and juice for flavoring. In this case the zest is mixed in with the sugar which makes the sugar wonderfully aromatic and delicious! I made the sugar/orange zest mixture the night before. I even topped the muffins with some extra orange zest sugar while they where halfway done baking in the oven.

I left out the baking soda from the original recipe because I realized this morning that I had run out and I couldn’t be bothered to run to the store and get some. I suggest adding it though, since you’ll get more of a ‘muffin top’ with the soda which my muffins were lacking a little.

I find that these muffins are best eaten a little warm, maybe 5 minutes out of the oven, with some butter, jam and lots of good coffee.

To the recipe:

Orange Berry Muffins (makes 12 medium sized muffins)
via Baking: From My Home to Yours

Grated Zest and Juice of one orange
About 3/4 cup (about 190ml) of butter milk
2 large eggs
3 tblsp. honey
118 g unsalted butter melted and cooled
65 g sugar
240 g all purpose flour
2 1/2 tsp baking powder
1/2 tsp baking soda
1/4 tsp salt
1 cup blueberries – fresh or frozen (not thawed)
Decorating sugar for topping (I just mixed another zest of an orange with about

Directions
Center a rack in the oven and preheat the oven to 400 degrees F or 200 degrees C. Butter or spray the 12 molds in a regular-sized muffin pan or fit the molds with paper muffin cups or cut out square shaped pieces of parchment paper to give the muffins a more bakery style look.

Pour the orange juice into a large glass measuring cup or a bowl and pour in enough buttermilk to make 1 cup or 250 ml. Whisk in the eggs, honey and melted butter.

In a large bowl, rub the sugar and orange zest together with your fingertips until the sugar is moist and fragrance or orange strong. Whisk in the flour, baking powder, baking soda and salt. Pour the liquid ingredients over the dry ingredients and, with the whisk or a rubber spatula, gently but quickly stir to blend. Don’t worry about being thorough – the batter will be lumpy and bubbly, and that’s just the way it should be. Stir in the blueberries. Divide the batter evenly among the muffin cups.

Bake for 22 to 25 minutes (mine baked for 24 and were perfect). If you want to top the muffins with decorating sugar, sprinkle on the sugar after the muffins have baked for 10 minutes. When fully baked, the tops of the muffins will be golden and springy to the touch and a thin knife inserted into the center of the muffins will come out clean. Transfer the pan to a rack and cool for 5 minutes before carefully removing each muffin from its mold.

I find them ideal for breakfast but they’re delicious as an afternoon snack with coffee or tea as well.

Have a nice thursday!
Sarah

Chocolate Almond Torte or Queen of Sheba Cake

Tags

, ,

A long time has passed since my last post but that definitely doesn’t mean that I haven’t baked up anything in that time. I just didn’t feel completely happy with the recipes I’ve been trying out recently. I’ve gone through a number of ‘baking fails’ making me feel disappointed even to the point where I promise myself I will never bake anything again. Seriously. But that feeling lasts for approximately two days or up until I see a picture of a new mouthwatering dessert that makes me forget that promise.

This cake however I ended up liking. Ever since I saw the movie ‘Julie & Julia’ I’ve been wanting to make the cake that is shown in a scene where Julie is decorating the sides with slivered almonds and her husband shoving pieces of it in his mouth. I actually didn’t know what cake it was so I ended up googling it and found out it was called Queen of Sheba Cake or Reine de Saba. Which is basically a chocolate almond torte that uses little or no flour but instead ground almonds. It is covered with a delicious chocolate butter frosting that tastes like chocolate mousse.

Since it’s both mine and my nieces birthday in September, we decided to do a joined birthday party. I was turning 21 and my niece turned 1. I knew I wanted to make something very chocolatey. Even though by the looks of my blog posts it may seems like chocolate is my favorite component when baking, I actually don’t make that many chocolate desserts. It just so happens that the recent cakes/sweets I’ve been pleased with have had chocolate as an ingredient of some sort. Maybe chocolatey desserts are just a lot harder to mess up. I wouldn’t be surprised. I firmly believe that good chocolate can really be the cure for a bad day.

So let’s get to the cake. The one I ended up making wasn’t Julia Child’s exact version. I made hers the night before as well and even though the taste was amazing, I wasn’t happy with the size of it. It turned out too flat and I wanted to make a cake that was a bit taller so I could garnish the sides with the almonds. So I used a Chocolate almond cake that was quit similar to Julia Child’s version but with increased quantities. I also added some hot espresso and rum essence to the cake since that’s what was used in Julia Child’s version. Other than that I adapted the cake recipe from Joy of Baking , A site that has truly never failed. I used The original frosting however but just added a tablespoon of powdered sugar for a little sweetness. The cake itself is very dense, fudgey and almost brownie like. I found it hard to eat it plain by itself but each bite needed to be accompanied with some vanilla ice cream or else the flavor would have been too intense.
Here’s the recipe:

Chocolate Almond Torte with Chocolate Frosting

For the torte
100 g finely ground almonds
4 eggs, separated
200 g good quality bittersweet chocolate, I used Lindt 70%
150 g unsalted butter, cut into cubes
150 g granulated white sugar, divided
pinch of salt
3 tblsp. freshly brewed espresso
1 tsp. rum essence
slivered almonds for decoration

Butter and line a 20cm (8 inch) springform pan with parchment paper. The grease the parchment paper and the sides and dust with some ground almonds. Tap out any excess. Preheat your oven to 190 C°.

In a stainless steel bowl set over a saucepan of simmering water melt your chocolate, butter, coffee and rum essence. Put aside. In a separate bowl place your egg yolks and 100 grams of sugar and beat until pale and fluffy. Beat the melted chocolate into the egg yolk and sugar mixture and gently fold in the ground almonds. In a grease free, preferably steel bowl, beat the egg whites until foamy. Add the pinch of salt and beat until soft peaks form. Slowly add the remaining 50 grams of sugar and beat until stiff. Fold in about 1/4th of the egg whites into the chocolate mixture to lighten it. Then quickly fold in the remaining egg whites with a rubber spatula.

Pour the mixture into you baking pan and bake for about 40 minutes. The cake will have risen but once you take it out it will start to deflate. Leave it to cool in the pan for about 10 minutes, then carefully run a knife through the sides of the pan and loosen it. Let the cake cool completely before frosting it.

Chocolate frosting
120 g good quality dark chocolate
2 tblsp. freshly brewed espresso
1 tsp. rum essence
140 g unsalted butter
1 tblsp. powdered sugar

Melt the chocolate, coffee and rum essence in a bowl placed over a pot of simmering water. Take off heat and whisk in butter tablespoon at a time and powdered sugar until you get a desired frosting consistency. If the frosting is too runny, just let it stand in the fridge for a few minutes.

Assembly of the cake

With a knife or a small offset spatula frost the top and sides of the cake using whichever decoration you prefer. Cover the sides with slivered almonds. The cake tastes best when it’s been kept in the fridge for a couple of hours. Serve it with whipped cream or, as I prefer, vanilla ice cream.

Have a great week!
Sarah

Sweet and Salty Brownies

Tags

, ,

Brownies are something that seem so easy to make but once you over mix the batter a tad bit or bake them a minute too long they just don’t turn out right. My idea of a perfect brownie is fudgy, moist and dense. These brownies definitely lived up to my expectations. I got the recipe from this book. I bought it in a bookshop in Estonia and read it from start to end the same day. The authors of the book, Matt Lewis and Renato Poliafito, are owners of a bakery in Brooklyn and the book is basically a collection of classic American desserts reinvented somehow. There are so many yummy recipes I need to try sometime soon but especially the brownie recipe struck my attention. I had heard about the Baked Boys’ famous brownies so I knew it was something I needed to try.

This recipe had a little twist to it however. Between the batter hides a thin layer of salted caramel. It’s not a lot and the caramel flavor is certainly not overpowering but it definitely adds some sweetness to the rich and dark chocolate brownie.
The recipe specifically instructed not to use too much caramel sauce between the layers since caramel gets burned easily. I used the leftover caramel to drizzle it on top of the post-baked brownie. I also sprinkled it with some sea salt.

I find the most important step to getting a fudgy brownie is not over beating it after adding the eggs. I used a wire whisk or a rubber spatula, not once did I use my electric mixer in this recipe. Once too much air gets into the batter the brownie will get cakey and well..kind of boring.

I also reduced the recipe and use 3/4ths of what was instructed in the original recipe since I don’t have a proper 9-by-13-inch brownie pan. So I used my 10-inch(26 cm) round springform pan instead and it worked fine.

I’m also in love with the vanilla extract I bought in Estonia. See, in Austria they don’t sell vanilla extract anywhere. They only have vanilla sugar or whole vanilla beans. Or vanilla essence (which is horrendous)…But when I found Nielsen Massey’s vanilla extract in an estonian grocery store I squeeled with delight. It was very expensive however, so I plan on using it sparingly.

So onto the recipe…

Sweet and Salty Brownies
via Baked explorations

for the caramel sauce
150 g fine caster sugar
95 ml heavy whipping cream
generous pinch of sea salt
3 tblsp. sour cream

lightly whisk the sugar and water together in a medium sized saucepan and bring to a boil over medium/high heat. Do not stir while it’s boiling but brush the sides of the pan with a wet pastry brush from time to time to avoid sugar crystals from forming. When the mixture is a dark amber in color take it off the heat, mix in the cream slowly and add the sea salt. Don’t be tempted to lick the spoon since the caramel is very hot and you might burn your tongue. Then add the sour cream and whisk lightly until combined.

for the brownie
120 g all purpose flour
1 tsp. salt
1.5 tblsp. dark unsweetened cocoa powder
235 g good quality dark chocolate (60-70%)
170 g butter
225 g fine caster sugar
60 g brown sugar
4 eggs
1.5 tsp. pure vanilla extract

Preheat you oven to 180° Celsius or 350° Fahrenheit. Butter a 10 inch round springform pan (or a brownie pan if you have one) and cover the bottom with parchment paper. Butter the parchment paper lightly.

In a bowl whisk together the flour, salt and baking powder.
In a saucepan set over a pot of simmering water (the bottom of the saucepan should not touch the water) add the chocolate and butter and melt over low heat until completely melted. Turn off the heat but don’t take the pots off the stove yet and whisk in the sugars until completely dissolved.
Now take the saucepan off the heat and add two eggs to the batter and lightly whisk just until incorporated. Add the remaining eggs and whisk just until combined. Next add the vanilla extract and mix until incorporated. Do not over mix the batter at this point.
Lastly sprinkle the flour on to the batter and gently fold it in with a rubber spatula until a few traces of lour are still visible.
Pour half of the batter in you pan and spread the caramel sauce in the middle without letting it get to near to the sides of the pan or it will burn while baking. Spoon the remaining brownie batter on top and smooth the batter.
Bake for 30 minutes rotating the pan halfway through the baking time. The brownies are done when a toothpick inserted in them comes out with a few moist crumbs.

Let the brownies cool completely, sprinkle them with sea salt and drizzle with the remaining caramel sauce.

Serve and enjoy 🙂

I actually turned the oven off after 25 minutes and let them rest in the oven for a few minutes since I was afraid of over baking my brownies.


I only made them today but I’m pretty sure they taste even more incredible the next day after keeping them in the fridge overnight.

Pistachio Rose Cake

Tags

, , ,

No, I didn’t bake a cake yet again! I can control myself and limit my cake baking to one (max 2) cakes per month..I think.
But I just wanted to share these pictures of a cake I made sometime around the beginning of May, long before I started blogging. It seemed like the perfect cake to bake for the start of spring and I love it for being beautiful and elegant yet still really simple at the same time.

It’s three layers of pistachio cake filled and covered with rose water flavored swiss meringue buttercream and topped with sugared rose petals and chopped pistachios. You can find the recipe here. I love Poires au Chocolat’s baking blog, I feel the author gives so much personality to each of her creations. I followed her recipe when making the cake but I used a slightly larger 7 inch pan instead of 5 inch so I ended up increasing the cake recipe by 50%. And I still only managed to get a three layer cake because since I’m not the most graceful when it comes to splitting a cake in two, I broke one half and it fell on the floor. Oh, well..practice makes perfect I guess.

What I liked most about making this cakes was decorating it. I did the rose petals the night before baking the cake and I don’t think I ever thought I could make something that pretty with such little effort. It’s only a matter of brushing some egg white onto the petals and the lightly covering them with sugar.

One thing I regret though, was adding a tad too much rose water to the buttercream. In the instruction the author clearly states that a little amount goes a long way when it comes to rose water. I was really excited about the rose water though, since I’d never used that flavor before so I kind of overdid it. I felt the buttercream tasted too flowery.

It still looks pretty though.

Chocolate Cake with Strawberry Buttercream

Tags

, , ,

So it’s been quite a while since my last post and a lot of things have happened. First of all, I just came back 2 days ago from vacationing in Estonia for 10 days. It was nice spending a few days abroad and getting out of busy Vienna for a change. We stayed in Tallinn – the capital. I’ve never really been a big city lover so staying in that small town, of only half a million inhabitants, was really nice and relaxing.

One place that really fascinated me the most was the antique bookshop I found, while me and my brothers family visited the city Pärnu to go to the beach. Now I’ve never been that much of a beach person..or rather swimming person. And as it turned out neither was my 3 year old niece. So after grabbing some lunch me and my niece decided to take a walk while the others went back to the beach. That’s when we stumbled across that bookstore.        Image

Since I really love anything vinatge that bookstore was like heaven to me. I’m a bit sad that I couldn’t stay there longer since we had to get back to the beach to meet the others. I did get some old piano notes and an Estonian childrens book for my niece however. The books only cost me 3 euro. I actually knew about these kind of shops since I went to them quite a few times back in the day when I used to live in Estonia. It just felt good to browse through one again.

Now – about the the cake! Lately I’ve been having a tiny obsession with layer cakes. I feel like the more layers a cake has the more dramatic and glorious it looks. So while I was in Estonia I actually made a 6 layer cake 3 times! Yes it took up quite some time but I think in the end it was worth it. Unfortunately the first cake I made didn’t taste that good in my opinion and I also managed to lose all of the pictures I took of it so I wont post about it. It was a white vanilla cake soaked in some ginger syrup and layered with blueberry compote. I frosted the cake with a cream cheese and mascarpone frosting, which was a disaster since my mom (who offered to buy all of the ingredients) opted for a light cream cheese. Now I don’t know if any of you ever bake with light products but for me this is absolutely not an option. The cream cheese was way too runny and I ended up putting the frosted cake in the freezer to let it firm. Even the taste wasn’t the same as the typical sweet but tangy cream cheese icing.  All in all people still came up to me and told me they liked my cake but I just wasn’t too happy, so I won’t make it again and I won’t bother with the recipe.

After that I made two more 6 layer cakes. I actually made two of exactly the same cakes. Chocolate cake with strawberry buttercream. I’m quite happy with how it turned out, I used the same chocolate cake recipe that I used before I only increased it slightly which meant i had thicker layers. Then I filled and frosted it with strawberry swiss meringue buttercream, which I actually really started to like. The buttercream is soft, light and sweet and the strawberry and chocolate pair very well with each other. I made the cake once for a small birthday celebration and once when I met with my friends one evening. Both times people really enjoyed it and I felt content with myself that I managed to satisfy people’s sweet tooth. Now here’s the recipe:

Chocolate Cake 

215 g all-purpose flour
400 g fine caster sugar
1 tsp vanilla sugar
100 g dark unsweetened cocoa powder
2 tsp baking soda
1 tsp baking powder
1 tsp salt
125 ml vegetable oil
250 ml buttermilk
250 ml hot freshly brewed coffee
2 eggs, room temperature, lightly beaten

First preheat your oven to 180°C (or 350° F) and line three 7-inch greased cake pans with parchment paper on the bottom. Now sadly, i only own one 7-inch pan so I actually had to bake each three layers separately. When I think about it now, I can’t believe I had the patience to do that.

Next you want to sift all your dry ingredients into a big bowl and slowly add the wet ingredients with your electric mixer to your flour mixture. This cake recipe is pretty simple and straightforward.

Now divide your cake batter into the three cake pans (or in my case into two bowls and one cake pan). To do that as accurately as possible I always weigh out my cake batter to make sure I get the layers even.

Bake the cake(s) in the oven for around 20 minutes and rotate them. Then bake an additional 7-10 minutes. I admittedly underbaked my layers a little because I really wanted a moist cake.

After the cake is done baking leave it cool on your counter and take it out of the cake pan after 15 minutes or so. I kind of rushed that step since I had two more batches to bake and didn’t want to spend the whole day in the kitchen.
Let your cake layers cool completely and once cooled freeze them for approximately 30 minutes before slicing and filling or frosting them.

Strawberry Swiss Meringue Buttercream

250 g fine caster sugar
150 g egg whites (about 5 egg whites)
340 g cubed butter, should not be completely cold but still firm
1 tsp vanilla extract
250 ml strawberry puree (I pureed frozen strawberries that I thawed for a couple of hours)

Add the egg whites and sugar in a stainless steel bowl and place it over a larger pot of simmering water without letting the bowl touch the water. Whisk the mixture lightly and heat it until the sugar has dissolved completely. Most recipes actually suggest using a candy thermometer but since I don’t own one I just rub a tiny bit of the mixture between my fingers and if it’s not grainy anymore that means the sugar has dissolved. Take it off the heat and beat the meringue until very fluffy and white, about 8 minutes. The bottom of the bowl and the meringue should have cooled completely. Now slowly start adding the butter cube by cube, beating after every single addition. Once the butter is added just keep on beating the mixture on high speed until the buttercream comes together. If it curdles at one point don’t worry – it will come together eventually. When it does, add the vanilla and pureed strawberries and mix until everything comes together.

Dark chocolate glaze

115 g good quality bittersweet chocolate
76 g cubed butter

Melt the butter and chocolate in a stainless steel bowl over a pot of simmering water on low temeprature. Let it cool a bit.

To assemble the cake

Image

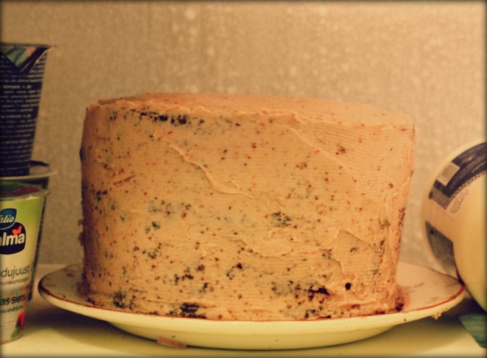
crumb coated cake in the fridge

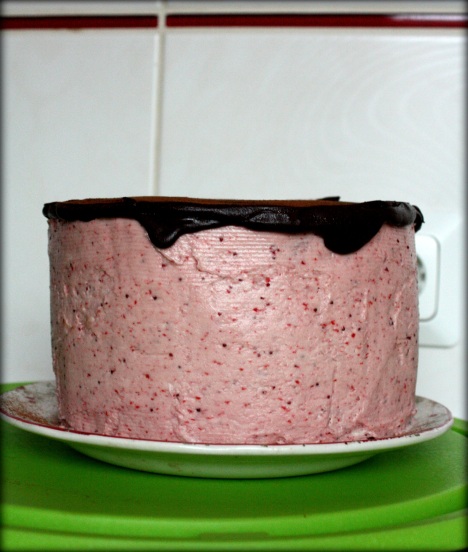
Crumb coat the entire cake with a thin layer of buttercream and place it in the fridge to set for about 30 minutes. Then repeat adding a thicker layer of buttercream over the entire cake. Smooth the surface with a benchscraper. Slowly pour the chocolate glaze on the top of the cake, spreading the glaze with a spatula slowly that it can run down the sides a bit. Place the cake in the fridge to make the chocolate set and bring to room temperature before serving.

Image

Finished cake. I should have chosen a nicer background, I know

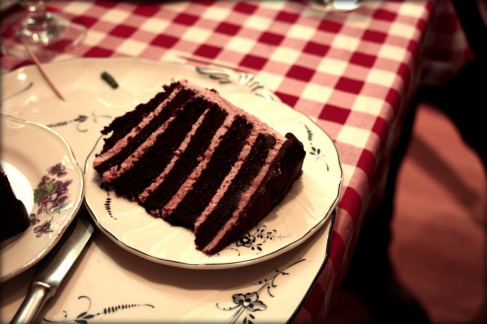
The cake is very decadent and most people couldn’t eat more than one slice. Only some of my hard core sweet tooth friends asked for another thin slice after 10 minutes. Even though the cake is small in diameter, it is very high and easily serves over 10 people.

Image

Until the next cake recipe,
Sarah


Salted Caramel Chocolate Fudge Cake

Tags

, , ,

Ok, so I finally did it. I created a blog…Better to say – a baking blog. I’ve been playing with the thought for quite a long time. Especially since in the last year I’ve become more and more obsessed with finding the perfect moist chocolate cake or creating the best tasting buttercream. And since I am now equipped with a fairly decent camera I feel that nothing is stopping me from finally creating this blog.

So enough about that, let’s get to the real reason I started writing this – 5 layer salted caramel chocolate fudge cake. Already the name sounds incredibly indulgent and amazing. Mind me, it was actually supposed to be a 6 layer cake, but the chocolate cake was so sticky that one layer stuck to the plate (after I stupidly forgot to cover it with a piece of parchment paper first)  and it split in half while trying to lift it. So I stuck with 5 layers, which is also relatively tall considering the fact that the highest I’ve gone so far is 4.

I found the recipe on Sweetapolita’s blog. I’ve been fascinated with her blog for more than a year now and the way she cuts her cake in such a clean and perfect manner never fails to impress me. I’ve haven’t tried one of her recipes yet though because I’ve always feared the cakes being way too sweet , especially the ones with lots and lots of pink frosting. I was pleasantly surprised however when I took my first bite of this cake. It wasn’t too sweet at all. In fact it could have easily been sweeter. The only thing I would change next time is I would thicken the buttercream layers between the cake and add some more caramel to the cream since I couldn’t taste it that much.

I did end up adjusting the buttercream recipe a bit since I am not a big fan of Swiss meringue buttercream. I feel it tastes too meringue-ish so I swapped it for a french buttercream. Here’s the recipe:

Moist Chocolate Cake 
This cake is very moist and not heavy at all. Even though it contains coffee, you can’t really taste it’s flavor at all but the coffee only brings out the chocolate more.

180 g all-purpose flour
300 g fine caster sugar
1 tsp vanilla sugar
90 g dark unsweetened cocoa powder
1,5 tsp baking soda
1 tsp baking powder
1 tsp salt
60 ml vegetable oil
190 ml buttermilk
190 ml hot freshly brewed coffee
2 eggs, room temperature, lightly beaten

First preheat your oven to 180°C (or 350° F) and line three 7-inch greased cake pans with parchment paper on the bottom. Now sadly, i only own one 7-inch pan so I actually had to bake each three layers separately. When I think about it now, I can’t believe I had the patience to do that.

Next you want to sift all your dry ingredients into a big bowl and slowly add the wet ingredients with your electric mixer to your flour mixture. This cake recipe is pretty simple and straightforward.

Now divide your cake batter into the three cake pans (or in my case into two bowls and one cake pan). To do that as accurately as possible I always weigh out my cake batter to make sure I get the layers even.

Bake the cake(s) in the oven for around 20 minutes and rotate them. Then bake an additional 7-10 minutes. I admittedly underbaked my layers a little because I really wanted a moist cake.

After the cake is done baking leave it cool on your counter and take it out of the cake pan after 15 minutes or so. I kind of rushed that step since I had two more batches to bake and didn’t want to spend the whole day in the kitchen.
Let your cake layers cool completely before filling or frosting them.

Salted Caramel French Buttercream
I didn’t use all of the caramel that is listed in this recipe but I regret not doing so. I was scared the cake would turn out to be too sweet but I ended up wanting a stronger caramel flavor, so I recommend you to use the entire caramel batch.

200 g fine caster sugar
60 ml water
60 ml heavy cream (I use 36%)
1 tsp good quality sea salt
4 large eggs
100 g sugar
1 vanilla pod
250 g butter

Start off by making the salted caramel. Add the water and the sugar in a saucepan and let the sugar dissolve under medium heat. Do not stir! Once the water starts boiling raise the temperature to high and let it turn to a dark amber color. As soon as it has reached that point take the caramel off the heat (be careful not to touch it or you will burn yourself!) and slowly whisk in the heavy cream with a fork or a hand whisk. Lastly add the sea salt. If you prefer unsalted caramel just omit the salt but I personally find the salt adds a nice (not too) salty hint to the sweet caramel. Now let the caramel cool to room temperature.

For the buttercream put the eggs in a medium sized bowl and beat them with your electric hand mixer for about a minute. Next add in the 100 g of sugar and beat another minute or so. Then put the bowl with the egg/sugar mixture over a pot of simmering water and beat another 5 minutes until very fluffy and pale in color. Take it of the heat and beat some more until it’s cooled.
Next beat your butter in a separate bowl on high for approximately 8-10 minutes until it is very light in color and satiny. Scrape out the seeds of the vanilla pod and add them to the butter. Add the egg mixture to the whipped butter and whip just until the mixture comes together. If it looks like the butter is separating don’t be discouraged- it will come together after a short time.

To finish, fold the salted caramel in the buttercream and be prepared to taste the most amazing combination ever! Try to use the buttercream immediately but if you want to refrigerate it, let it come to room temperature before using it.

Chocolate Fudge Frosting

400 g dark chocolate (I used 72%)
45 g dark unsweetened cocoa powder
100 ml boiling water
340 g butter brought to room temperature
65 g powdered sugar
pinch of salt

This frosting is really not as sweet as I imagined it would be. Maybe it’s because of the dark chocolate and unsweetened cocoa powder.
Start off by melting your chocolate over a pot of simmering water. Make sure your melted chocolate is completely cooled before you add it to the frosting otherwise it will melt the butter and you will end up with a runny icing. I actually melted the chocolate before I even put the cakes in the oven so it had plenty of time to cool off.
Combine the boiling water and cocoa powder in a cup and mix until the cocoa powder is dissolved.
In a medium sized bowl beat the butter with the powdered sugar and salt with an electric mixer for about 5 minutes until pale and fluffy. Add the cooled melted chocolate and stir gently. Lastly add the cocoa powder and mix just until everything is incorporated.

To assemble the cake

Take all of you cooled cake layers and cut each of them in half. I use a sharp bread knife for best results.I tend to get eye level with the cake in order to cut through the layers as evenly as possible.
Once you’ve finished that step, dollop about 1/2 cup of the buttercream on the first layer and distribute it with a palette knife (I don’t own one of those so I just use a regular bread knife) evenly among the surface. Repeat that step with each layer until you’ve added the top layer.
When the cake is fully stacked, put a generous amount of chocolate fudge frosting on top of the cake and spread it on the surface until it starts running of the sides. At this point you only want to crumb coat the cake, so spread the frosting very thinly. Once the top is thinly covered in frosting, add some more for the sides of the cake and fully crumb coat the entire cake. It does not need to look perfect since another layer of frosting is yet to come. Place your crumb coated cake in the fridge for 30 minutes (if the remaining frosting is too warm/runny you can put that in the fridge too).
After the crumb coat has set take your cake from the fridge and add another generous dollop of frosting on the top. Repeat what you did when you were crumb coating the cake but add thicker layers of frosting. You can remove any remaining frosting and smooth the sides and the top with a bench scraper. You can sprinkle some Fleur de Sel on top of the cake before serving.

Now the cake is ready to be eaten but I prefer to let it sit at room temperature for a couple of hours. I tasted it about 4 hours after finishing it and it was good but honestly speaking it was even better the day after making it. It is very soft and melts in your mouth. Next time I will add more caramel to the buttercream since I would have wanted the flavor to come out more.

If you want to refrigerate the cake, make sure you take it out of the fridge at least 2 hours before serving to let it get to room temperature because cold buttercream tastes hard and well..a lot like butter.

The cake remained delicious staying at room temperature for 3 days but I’m pretty sure it could have lasted even one more day.

Have a nice week,
Sarah